Week 70 - 24 March 2004
Week 70 - 24 March 2004
First off, Daughter and Grand-Daughter are doing Wonderful. Thanks to
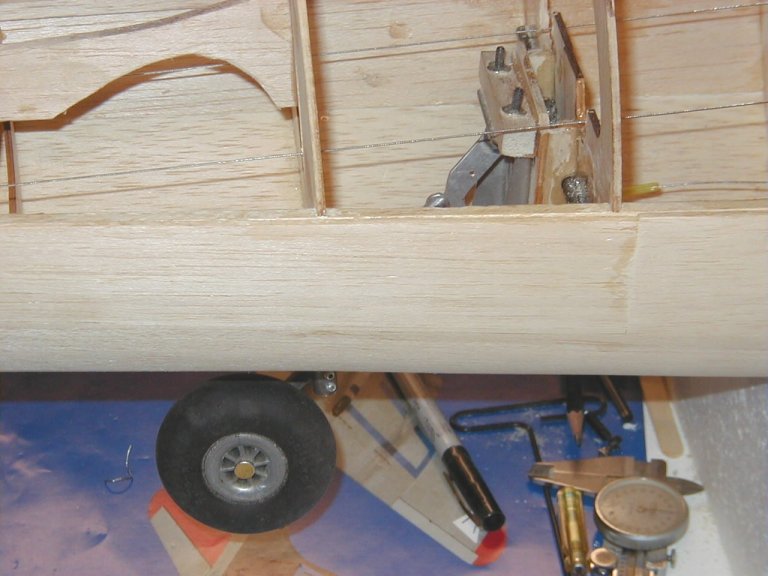
all you for the well wishes.Well back in the saddle again. First on the agenda is to finally mount the tail wheel bracket! The bulk head has notches for the tail wheel bracket to fit into, but the bulk head seems very weak and/or flimsy. So our fix was to mark the tail wheel bracket after inserting into the notch. Now we drilled holes to allow carbon fiber rod to go through the the bracket and flush to the bulkhead. After a trail fit we epoxy everything in place. This worked well, as the bulkhead is much stronger and rigid now. We pat ourselves on the back and move on to the next item connecting the tail wheel steering.
We are using pull-pull to achieve this and as you may recall, connecting to the rear to the rudder control arm. We also are using a spring at the tail wheel to take the shock away from the rudder servo. Calculations are made the the cables with the springs are built and installed. Looks good but the spring is too light, so off to the hardware store we go to buy heavier springs. Back to the shop we go and install them. These springs are much better, and the steering is much more positive. Now let's raise the tail wheel.......OOPS. Because of the heavier springs there is too much pressure to retract the tail wheel. GOLLY GEEEE WIZZZZZZZZ. We sit back and look the situation over. We knew the spring tension would be backwards done this way, but thought it would work. DIRTY SON OF A GARBAGE CAN!!!!
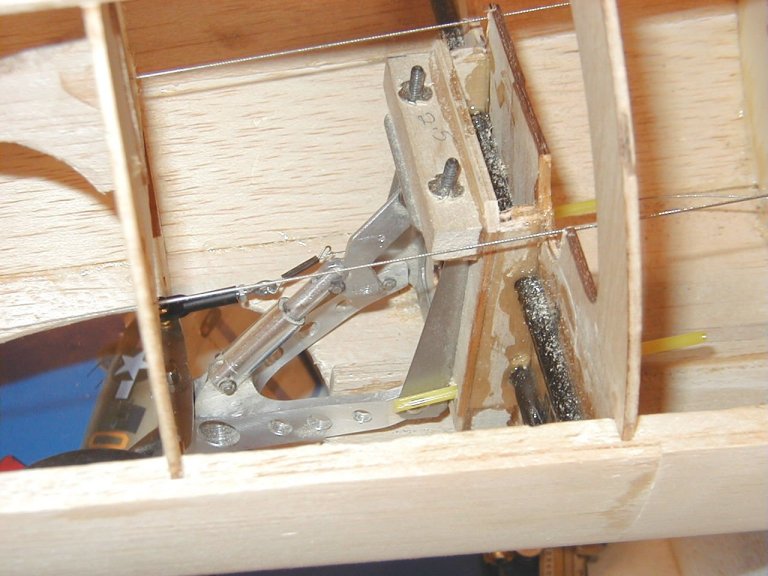
Remove the tail wheel steering cables and start all over. We really wanted to do it this way because it was easier, but now we will do it the right way, pulling from the front or servo side. This will remove the spring tension when the wheel is up and increase the spring when locked down, which will give more positive steering. Calculations are made and holes are drilled through the tail wheel bracket & bulkhead to allow passage of the pull-pull cables. We installed inner Ny-rod in these holes for wear resistance to the cable. By this time it is getting late and we are tired, so we call it a night and clean the shop. Things will be better next week as we are now on the right track.
--
Gary Himes

Week 71 - 31 March 2004
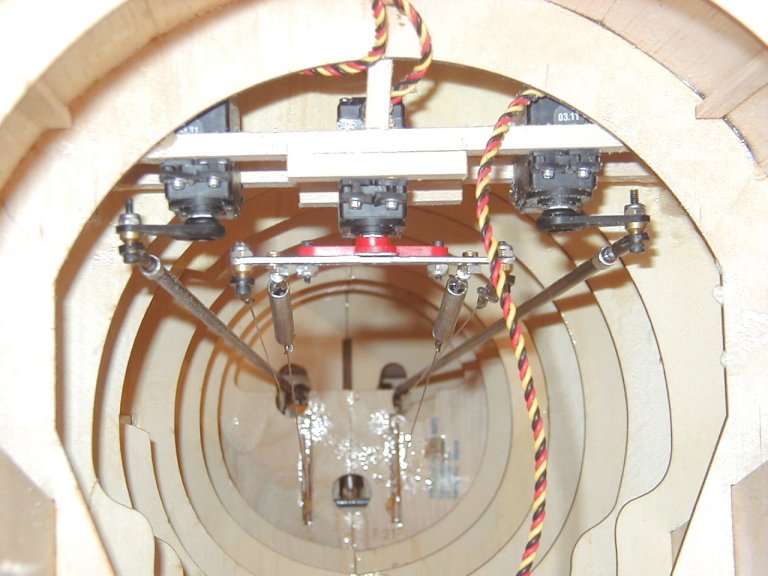
Greg was gone tonight because of business. Even though we were short a man we had a very fruitful night. We started the night by running the pull-pull cables from the servo to the tail wheel assembly including the springs. Now for the moment of truth; we released the tail wheel lock and it literally snapped into the up position. Next pull the tail wheel back down, very little pressure needed. Way Cool!!!!
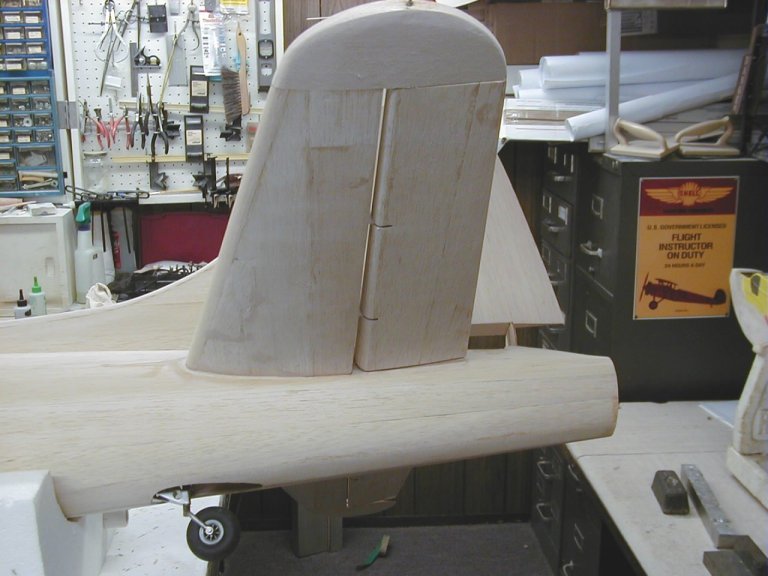
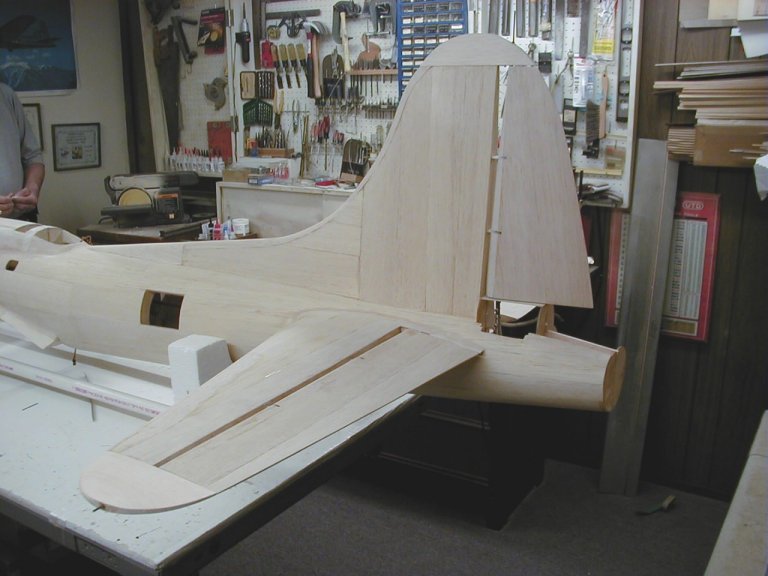
Next, we slid the horizontal stab into place and installed the elevator push rods. Now we stick our heads into the fuse and check all the clearances between all the controls. Not even a hint of interference! Feeling good, we now locate and install the two elevator servos. We did not hook up radio and play with the controls. We are on a roll and don't want to stop.
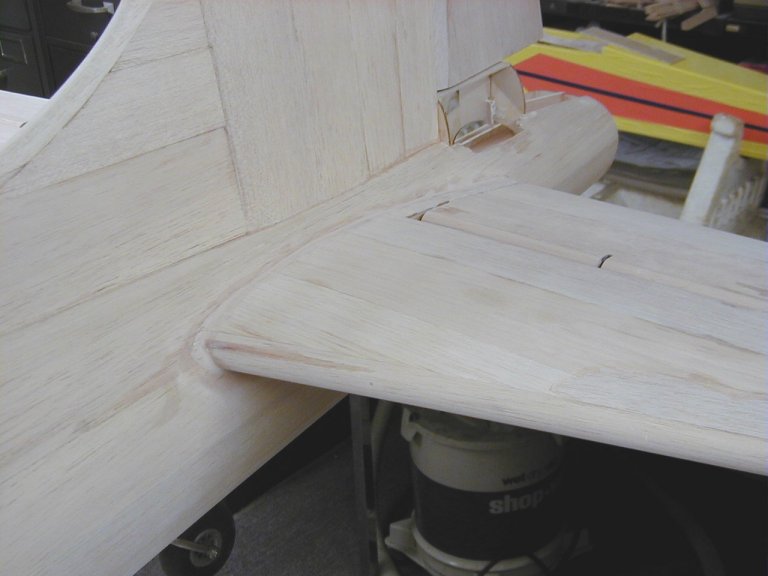
We set the horizontal stab in place and take tons of measurements. We are happy so we tack glue into place. After a short dinner break we come back and recheck all measurements. We find the starboard side is a shade lower than the port side so we added a small shim to correct. We now stood back and eye-balled it to check how it visually looked. Looks great, so one last run on all measurements. Looks good so we glue into place. With that done we turn to the port side, and add filler strips of balsa as needed. Finally we got out the balsa filler and added the small fillets around the horizontal stab. "Happy campers" we were we called it a night.
-- Gary Himes